Friday, January 24, 2014

Sequin heart elbow patch - tutorial

 How cute is this???
I was on the hunt looking for a cute somethin' special for my little girls to wear on Valentines, and found nothing ( that I would be comfortable with them wearing anyhow...:) )
I know they love sparkles, so I came up with this cute little elbow patch idea that works with any long sleeve pattern you have.

Perfect for Valentines day (or any day really...what doesn't look good with sparkly hearts?)
This works with any pattern, knits or wovens, and can actuallly be put anywhere on the shirt, not just the elbows as an embellishment. You could even add this to an already made shirt (although it would be tricky to add to the sleeve on a ready made garment) *** I have used my Sweetheart cardigan pattern...coming soon!)


What you need:

  • Sequins
  • Seed beads
  • thread
  • heart shape cut out of card stock/thick paper (any size you like, mine was 3" high)
  • small amount of interfacing
  • fabric for your garment, or a ready made piece of clothing 

Here is what I did:

take your sleeves and fold them in half length wise, press well to create a fold line. This is the center line to line up your heart. (I like to hem my sleeves first to get the placement right, but this depends on what you are making and your pattern's directions)


take your heart shape and place it just about half way up from the hem on the right side of you sleeve


make sure to center the hear along the center line you pressed to make sure it is even


trace you heart

if you are using a knit or thin fabric then you will want to iron on a small piece (slightly larger then your heart) of interfacing on the back


Tip - I like to take a scrap piece of felt and put my sequins and beads on it, keeps them from blowing/rolling away and makes them easy to pick up

Starting along the edge of the heart, pull your thread through the back of the sleeve, sew on a sequin from behind, add a seed bead to the thread, go back into the top of the sequin (skipping the bead) and go to the back of the sleeve. See how the seed bead holds the sequin in place without showing the thread? nice!
start again coming up just beside (about 1/4" or less) of the sequin you just sewed.


Continue going around the outside edge first, and keep going until you fill up the heart

now do the other side!
complete your garment as directed.


What a glam way to celebrate Valentines!


~ Christine

Tuesday, January 14, 2014

New Year...some store changes

Happy New Year!

www.heidiandfinn.etsy.com


2014 is starting out great, and we have a few changes that we would like to announce
We spent much of December asking our customers what changes they would like to see in our store...and we listened!

NEW - Licensing


We are happy to announce that we now support all small scale and handmade businesses  and no longer require a sellers license for items made with our patterns.
You are now welcome to sell any items you make from your Heidiandfinn patterns.  This is limited to the amount you can personally make, outsourcing and mass productions is still strictly prohibited.  We would appreciate that you credit Heidiandfinn as the designer of the pattern used in your listings/tags etc.
All our patterns are copyrighted to Heidiandfinn. It is illegal to share, trade, reproduce or sell any Heidiandfinn patterns. 

NEW – pricing
We are now offering discount bundle pricing for those who purchase the same design in both the smaller and larger size set.


www.heidiandfinn.etsy.com 

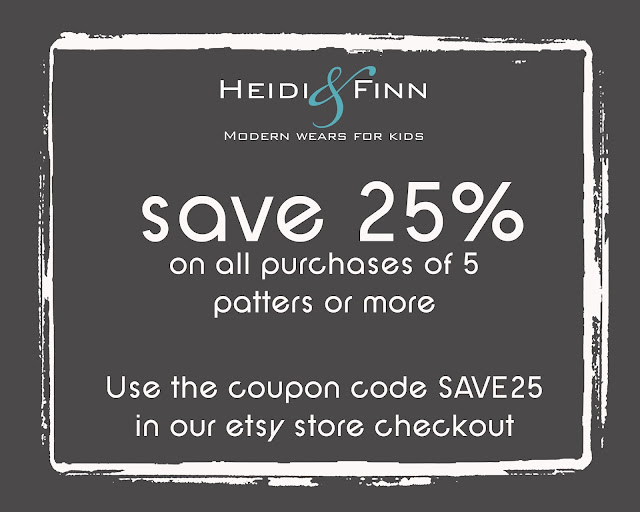
We will now be offering an ongoing discount code on all purchases of 5 or more patterns. Use the coupon code SAVE25 to receive 25% off your order of 5 or more patterns purchased at the same time. 

www.heidiandfinn.etsy.com

More to come....

We are continuing to improve all our patterns, to increase our sizing and to include size charts and fabric suggestions in every pattern. While we do not have specific release dates for everything...keep watching for announcements when updates become available :)
 

Saturday, December 14, 2013

The Norah Dress ( x3) Tour - MouseHouseCreations

Hi Everyone! A big thanks to Hayley for asking me to be a part of this, I have loved her blog for a long time and am super excited for her new pattern line


I had a lot of fun with this pattern. I mean  A LOT, as in I made 3 of them for my girls! It is such a versatile pattern.
First up, I made the Norah Dress as is, no changes....and it is great!


I used a mid-weight plaid cotton that has a good amount of stretch in it (actually this mystery fabric was a gift my mom brought back from Germany for me, so I am not really sure what it is, but it is fab!) The dress fits great, with lots of 'twirlability' (is that a word?...it is now)


I  Love the Swing to this dress! I used a contrasting yellow binding for the collar and added some yellow stripes and binding detail to the hem.

The perfect dress for our chilly Canadian winters

Next up, I made a tunic version for my youngest. She does not do well with dresses, so it is leggings and tunics 99% of the time.  I opted for no collar and dressed up the shoulders with leather panels


I used a heavy sweatshirt fleece (which may have been a little too thick for such a small size), but it is really snuggly warm for her

I paired it with a pair of black velour/sparkle damask leggings (I do not know where I got this fabric, but found it in my stash....and now I wish I had more...It is glorious!)
 

I found some scrap leather that matched perfectly (what are the odds?!) , so I added some shoulder details that wrap to the back


It closes at the back with a small leather buckle, rather then a button....I think it looks really cute!
***my first time working with leather btw.... not too shabby


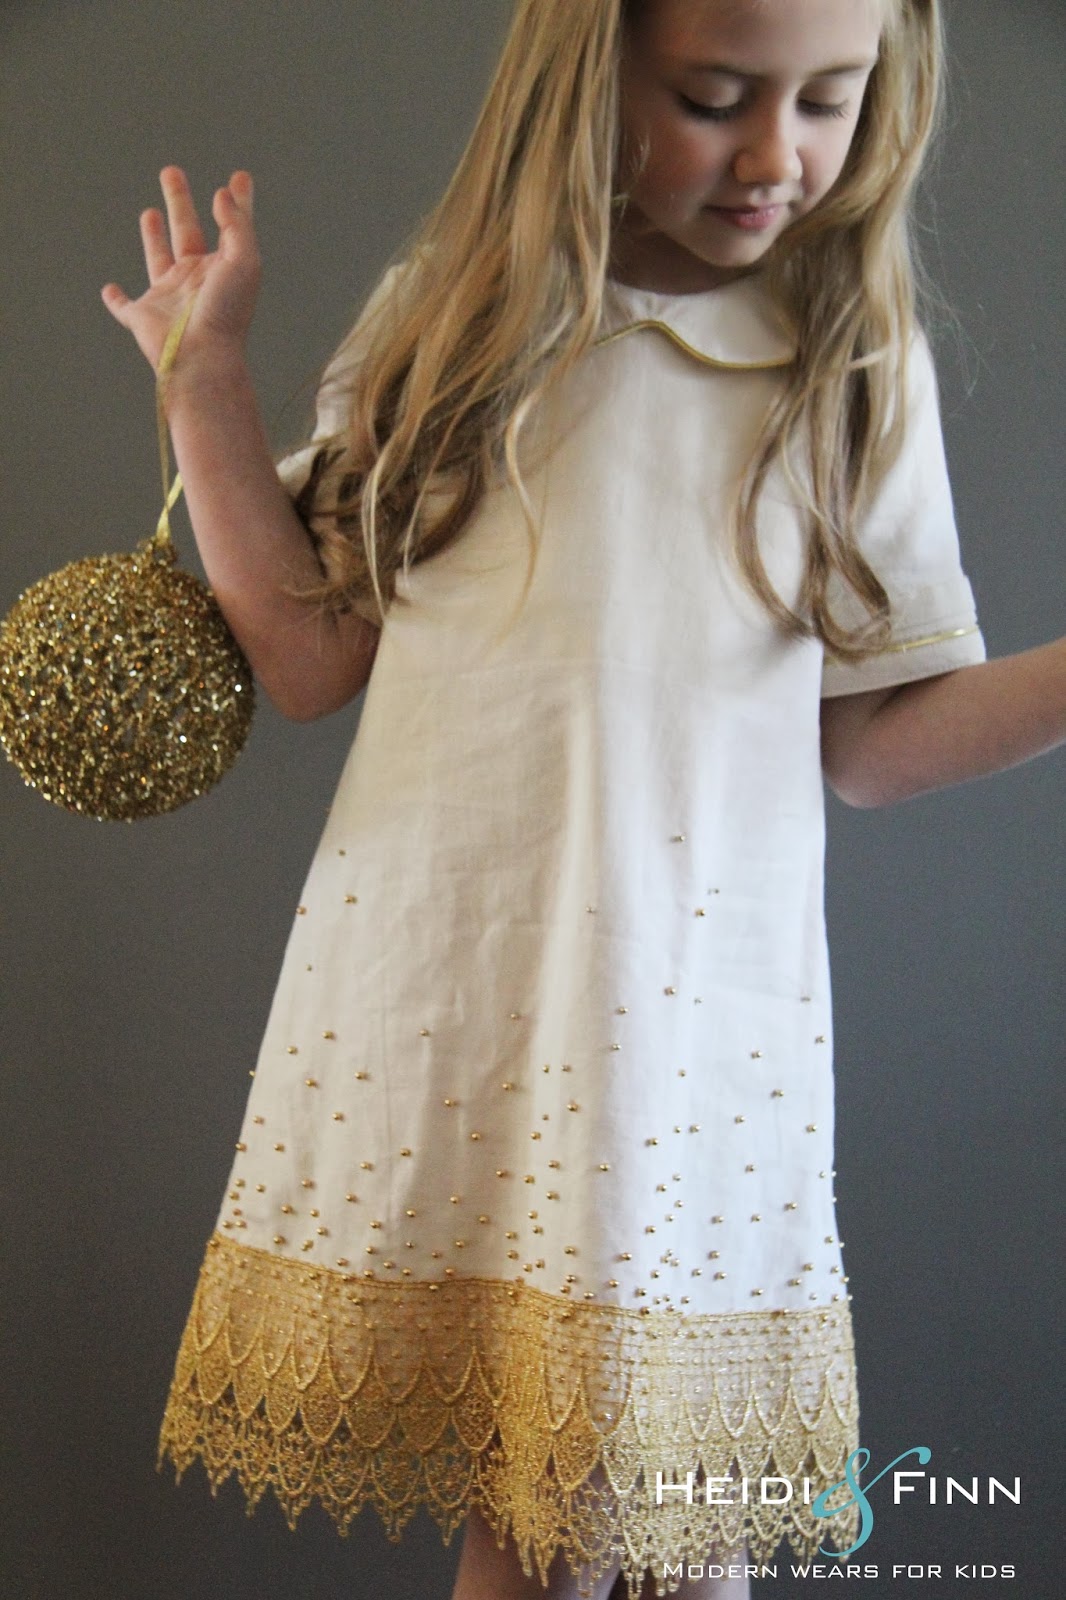
And finally, my showstopper, A golden Norah. One of my oldest's Christmas dresses. Yes, I said ONE of....we have 3 big family parties, which she requires 3 dresses, such a diva, can't wear the same outfit twice :) 


This one is my Fav! It started with a great vintage lace trim that I found online, and a champagne linen.


I had to slim the bodice slightly (not because of fit issues, but because I was about 8" too short with my trim)


I used a gold piping on the collar. I shortened the sleeves (to a longer short sleeve), and added some piping and trim detailing to the cuffs.


Then to up the sparkle (you can't have enough sparkle with a 5 year old...right?) I sewed on a ton of little gold beads....yes I sewed them all on by HAND! and I absolutely hate hand sewing....oh the things we do for our kids!

I really do love this pattern! I think there is so much you can do with it!


Can't wait to see what everyone else has come up with, Happy Holidays

~Christine
Related Posts Plugin for WordPress, Blogger...