Showing posts with label Kids Clothing Week. Show all posts

Friday, October 24, 2014

Kids Clothes Week - Outfit #2 bubble dress


So there was not a ton I was able to share for Kids clothes week - but here is one of them. You may have noticed that I am working hard on updating and expanding all the sizes on older patterns (lots and lots of you ask! :) )

So the next pattern up is the Bubble Dress - one of my first patterns and also one of the most requested in bigger sizes. I have made about 6 different versions this week, but only managed to get this one photographed so far :)


Once again I chose a fabric that is hard to photograph. This is a really soft mid-weight Marimekko satine. It has beautiful drape and the most beautiful sheen (hence, hard to photograph)


It is actually a much deeper red in person with burgundy and wine circles, the purple is actually a deep eggplant color. seriously great stuff and a dream to sew with. I am pretty sure this will end up as one of my daughters holiday dresses this year.


I have this pattern drafted up to size 12y and the pattern will be ready for testing next week, so make sure to follow our facebook page to sign up

~Christine


Thursday, October 23, 2014

Slouchy Beanie hat - FREE pattern for kids clothes week


Project 2 for kids clothes week - HATS! more specifically oh so cool slouchy beanies! Somehow my kids seem to lose about 10 hats each fall/winter season, and we are scrambling in late February to find something that fits...so this year I wanted to be prepared.


This is a great project for all those small pieces of fabric you have left from other projects that you don't know what to do with. Also perfect for up cycling old knit clothing.


 It requires around 1/4 yard of fabric AND (the best part) take about 15 min to sew! no joke, faster on a serger too!


What you need:
  • 1/4 yard or so of pretty much any knit fabric that has some stretch to it (jersey, french terry, sweater knit, fleece, sweat-shirting, stretch wool etc.)
  • download the pattern here, and cut out the size you are making **Note the sizes are only approximate, you may need to make a different size according to what material you are using and your child's head, for reference my oldest is wearing the 3-6y size (she is sz7 store bought) and my youngest is wearing the 12m-2t (she is sz3 store bought)
https://drive.google.com/file/d/0B_8Gt0xYcWccdUhmS0Z6LUV4bDg/view?usp=sharing

How to:
Cut your 2 hat pieces (main hat and brim)


fold the main hat in half and sew the sides (tapering your stitches along the folded edge). Seam allowances are 1/2", but for a more slouchy look, or if you are thinking your material does not have that much stretch use a 3/8" seam allowance.


rearrange your hat, so the seams are now laying on top of eachother and matching up at the top. Sew from one end to the other of the opening on the top, once again tapering your stitches at the folded edges


Take your brim piece and fold in half with right sides out. Press well


unfold and refold so the brim is in half with right sides together and the short edges lined up. Sew along the short edge to form a tube. fold the tube back in half  along your pressed edge so right sides are out again.


Line up the brim with the hat so the folded edge of brim is facing the raw edges of the hat, and side seams are matching.  Slip the brim over the hat and line up all the raw edges( of hat and brim). Pin together


Sew the brim to the hat with a STRETCH stitch (using your serger or zigzag/stretch stitch on your sewing machine)


Done! (wasn't that fast)
 

Now....


 Seriously...what are you waiting for....


~Christine


Saturday, November 2, 2013

Kids Clothing Week - wrap up


This is my first time even attempting at participating in Kids clothing week. Usually I am way too busy, but most times I just completly miss it. I still was late to the game -prewashing fabric and printing patterns the first day (while most sesoned KCW-ers have this done earlier so the actual week is spent SEWING!) I guess I will have to remember that for next time ;)
I did manage to make an outfit for both my girls, even though more were planned.  (I actually made a few other things for new patterns that I can't share just yet- more to come on that)
I kept it simple. Serger friendly projects that they could get lots of wear out of , and that they needed.
I used the fab Bimaa pattern from LouBeeClothing.


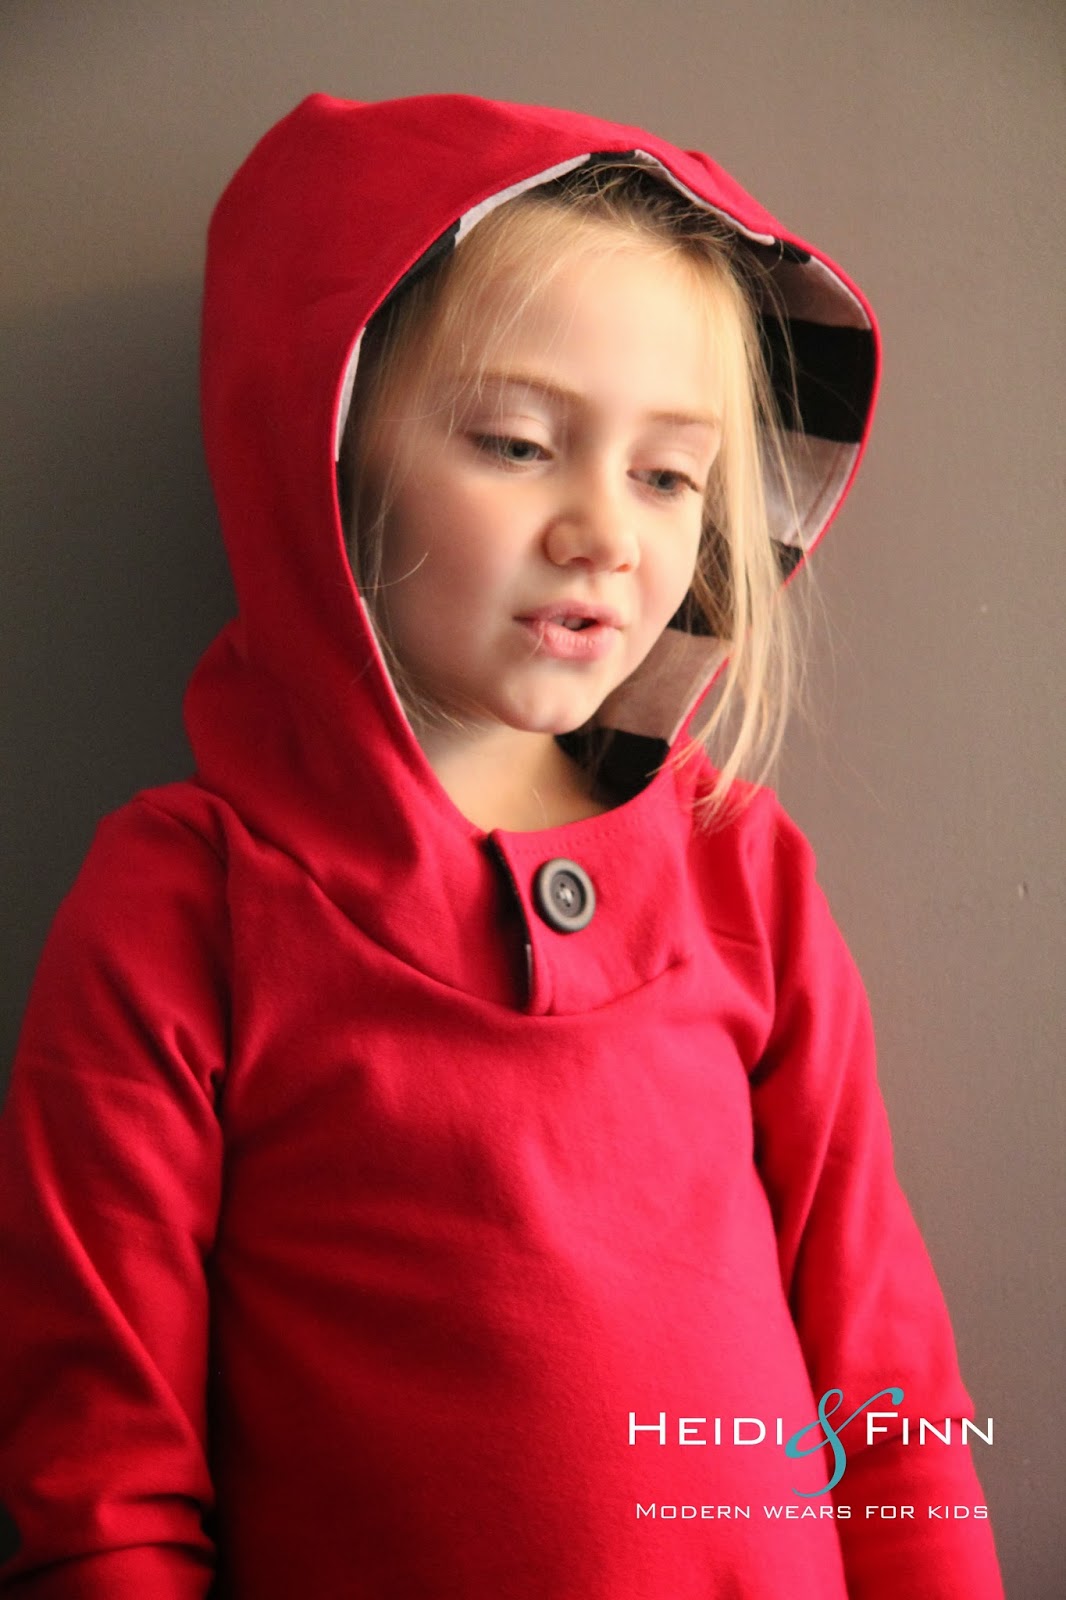
I adjusted it slightly to make tunics, perfect for covering little bottoms and to wear with leggings. For the red bimaa, I used a med weight sweatshirt fabric that had lots of stretch but was really warm.
I lengthened the bodice by about 8" and extended the side out so the bottom hem was about 9". This gave the bottom of the tunic a little more room for moving/sitting/jumping and created a cute bubble effect that I love!. 


I also adjusted the hood, buy extending the front neckline out by 2". I sewed the hood, keeping the fronts seperate so they could overlap. I added the button hole and pinned the fronts together and then sewed the hood in the neckline.


Everthing else I kept the same and constructed as the pattern explained (really well done by the way!)
I love the end result and it is the perfect tunic for school and the colder weather.  It looks great paired with a super fun pair of Alice in wonderland leggings (self drafted pattern)


For the black bimma, I used a lighter black jersey and only lengthened it about 4", I kept the hood the same as in the pattern. I lined the hood and made leggings with a fun aztec print. Easy peasy....and comfy!


 two outfits done, many more to go for the winter wardrobes...what did you make for kcw?


Related Posts Plugin for WordPress, Blogger...